
Upgrade of my Artillery Genius Heat Bed
Artillery Genius Heatbed Upgrade
I own an Artillery Genius 3D printer since now more than 1.5 years, and now the temperature sensor’s cable broke. This is unfortunate, because I’ve read multiple times that a strain relief for this cable is an upgrade you should definitely print. But I’ve constantly ignored it. Ok, lesson learned. (BTW: The ribbon cable of this printer also needs a strain relief!)
As a hotfix, I replaced the broken part of the cable, which surprisingly worked for a few prints but is certainly something from the do-not-try-this-at-home category. Be reminded that the heating bed of this printer operates at 230V! Looking at the picture, you will surely come to the same conclusion I did: This won’t last very long.

The Upgrade
You can just buy a new heat mat for ~35€, but since I’m on it anyway, I decided to directly go for an upgrade of the complete heat bed.
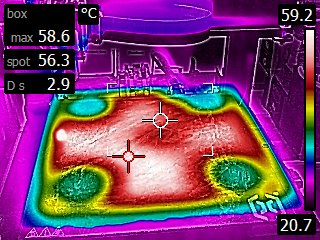
The stock glass surface is just fine, but the heat-matte is not doing a good job in heating the plate evenly. You can see from the following picture that the corners, above the mounting screws, the bed is significantly cooler than in the center. No problem for small prints, but this has ruined a few larger prints already.
It is rather difficult to find a different heat mat, at least if you don’t want to import something from the USA or China. The only thing I found was the Princore Genius Heat Mat from a German shop. There is more choice for aluminum beds, so I chose the following for no particular reason: ABS Maschinenschutz Heat Bed
The assembly was mostly straightforward. You need to shorten the cables and have to pay attention not to damage anything. Some remarks on this:
- It is advisable to use ring terminals to attach the new wires to the printer.
- ⚠️ Only do this if you know what you are doing! 230V are dangerous! ⚠️
- ⚠️ The bed MUST be connected to ground ⚠️

Ok, so does this improve the situation? I’m not doing a scientific level analysis here, but I do have some results:
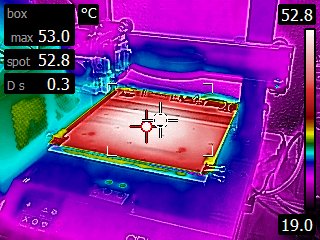
First, I wanted to know if the mat heats more evenly than the stock one which has the cross shape heating characteristic. So I’ve taken a thermal camera picture of the bottom of the heat bed without any isolation:

It’s a bit hard to judge if the mat heats up more evenly, or we do mostly see the effects of the metal plate dissipating the heat more evenly, but it looks better than before!
But what about the obviously more important surface temperature?
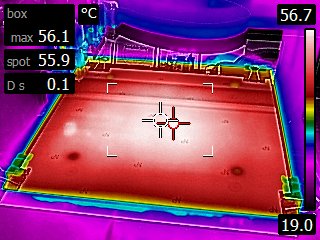
I’d say, this looks quite nice. Definitely better than before! The plate also seems to be sticky enough, but I only did one short test-print so far.
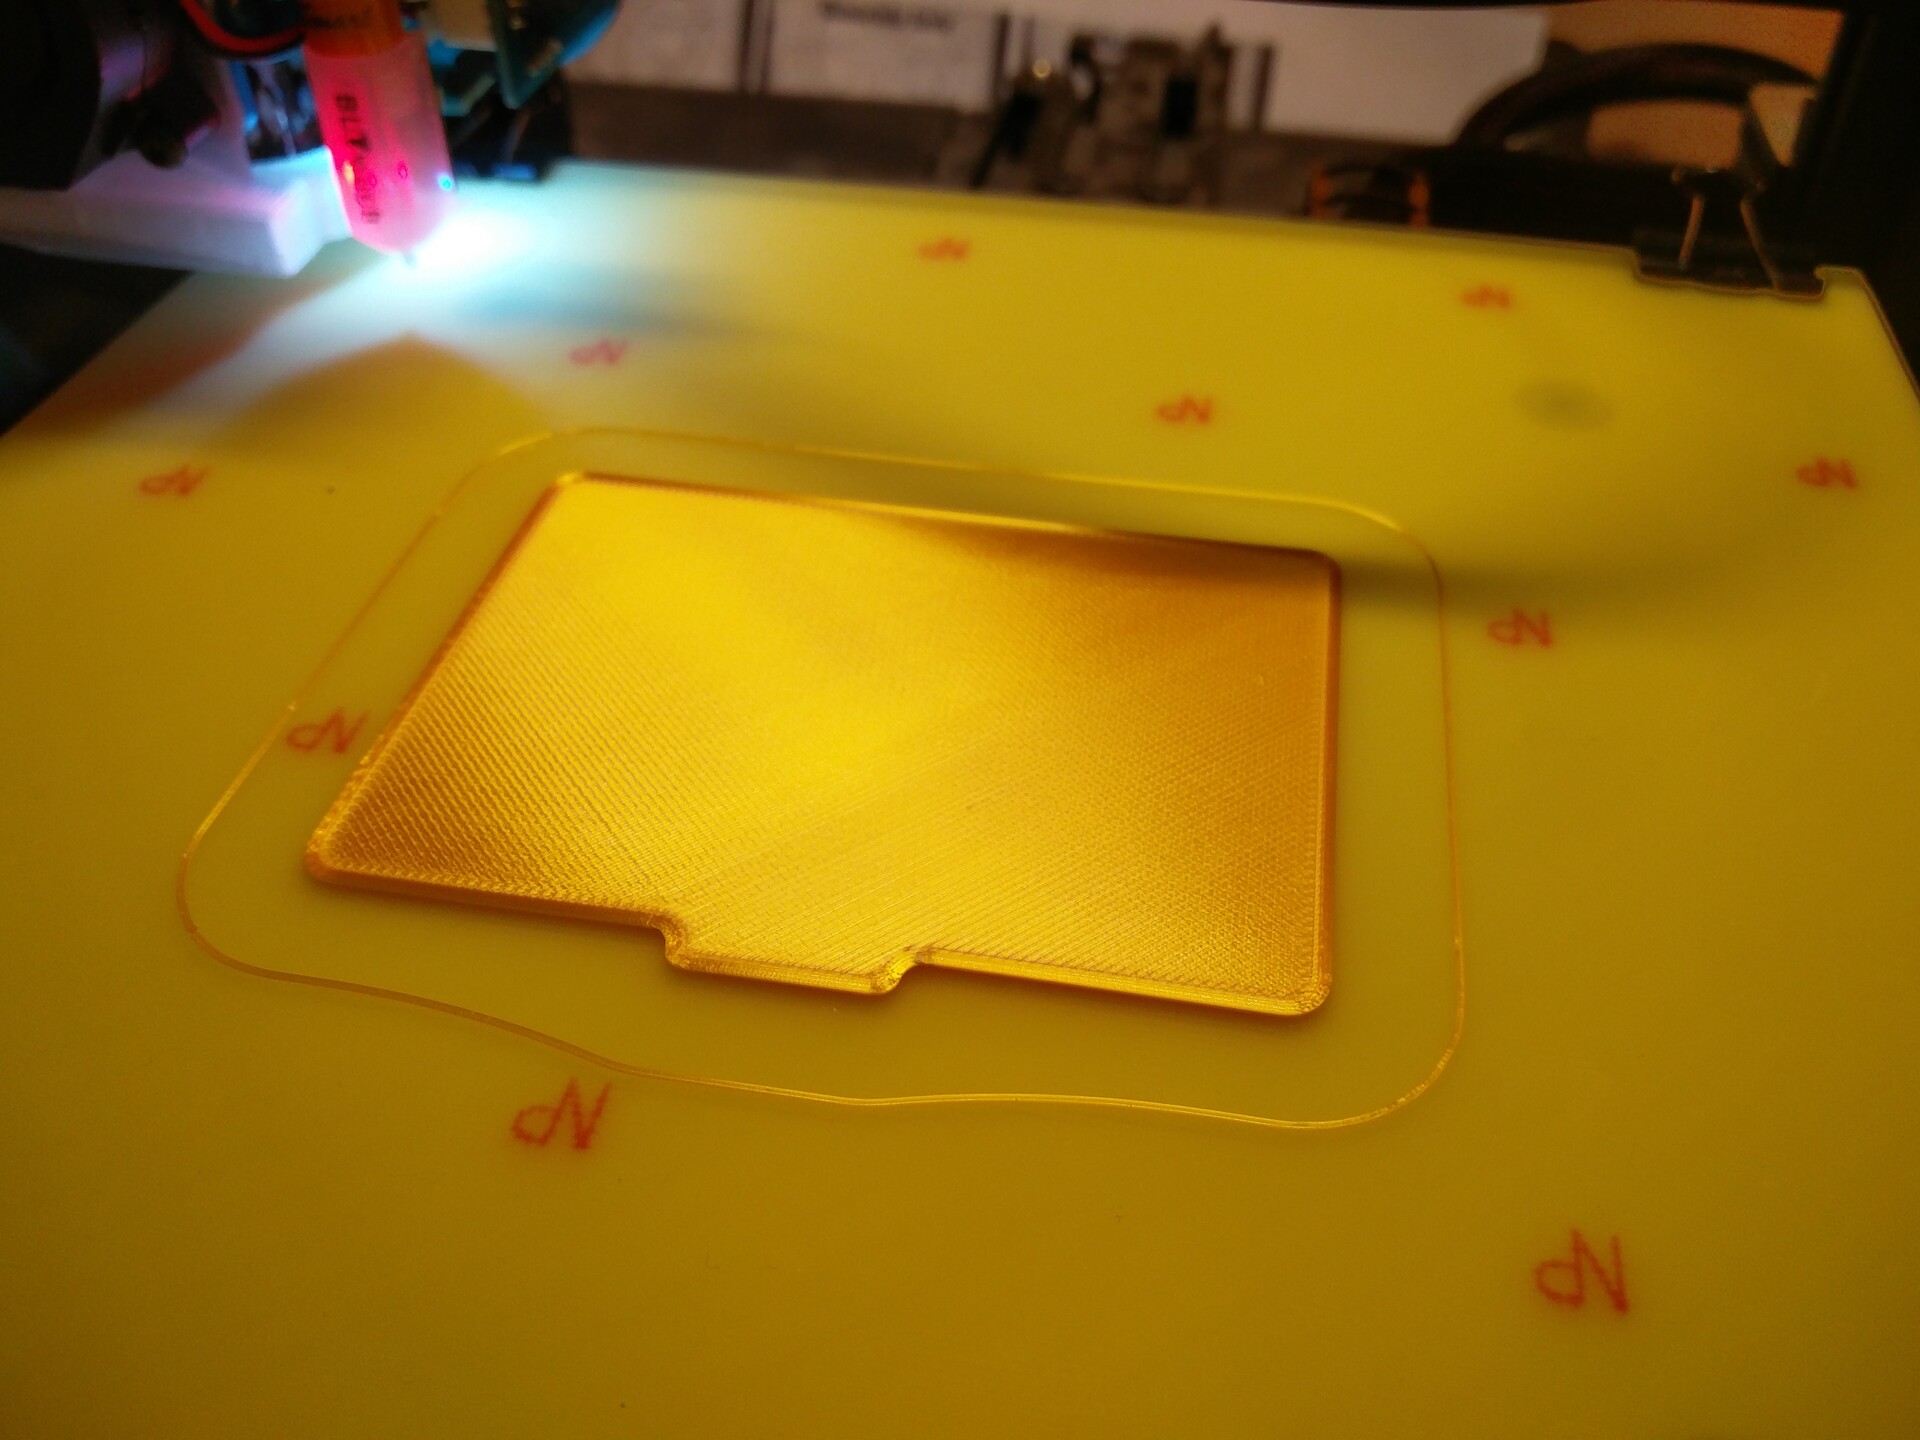
The bottom is very smooth. You see small gaps, which I’ll tackle later on. So for now, in all I’m rather pleased. Is it worth the 100€? Hmm, time will tell. Let’s see how long this will last. But if you don’t want to spend the money, be sure to print and attach a strain relief, so your bed will last longer than mine!
- This one for the bed. You have to attach it to the metal plate which is holding the bed screws.
- I have printed this relief for the X-axis ribbon cable, but it needed some manual adaption since it is made for the Sidewinder X1 and not for the Genius.
Happy Printing 🖨