
Rust on STM32: Getting started
(Thumbnail: Rust Embedded WG Logo - CC-BY)
Preface
I didn’t found any time and motivation to write something here, but I guess it’s time for an updated version of my previous post on Rust on the STM32F1 I plan to make more shorter and more modular posts, but to get started, here is a short tutorial on how to get started:
🎉 Blink an LED in Rust on a cheap microcontroller. 🎉
What you need
- A PC with an installed Rust Toolchain (which also should involve
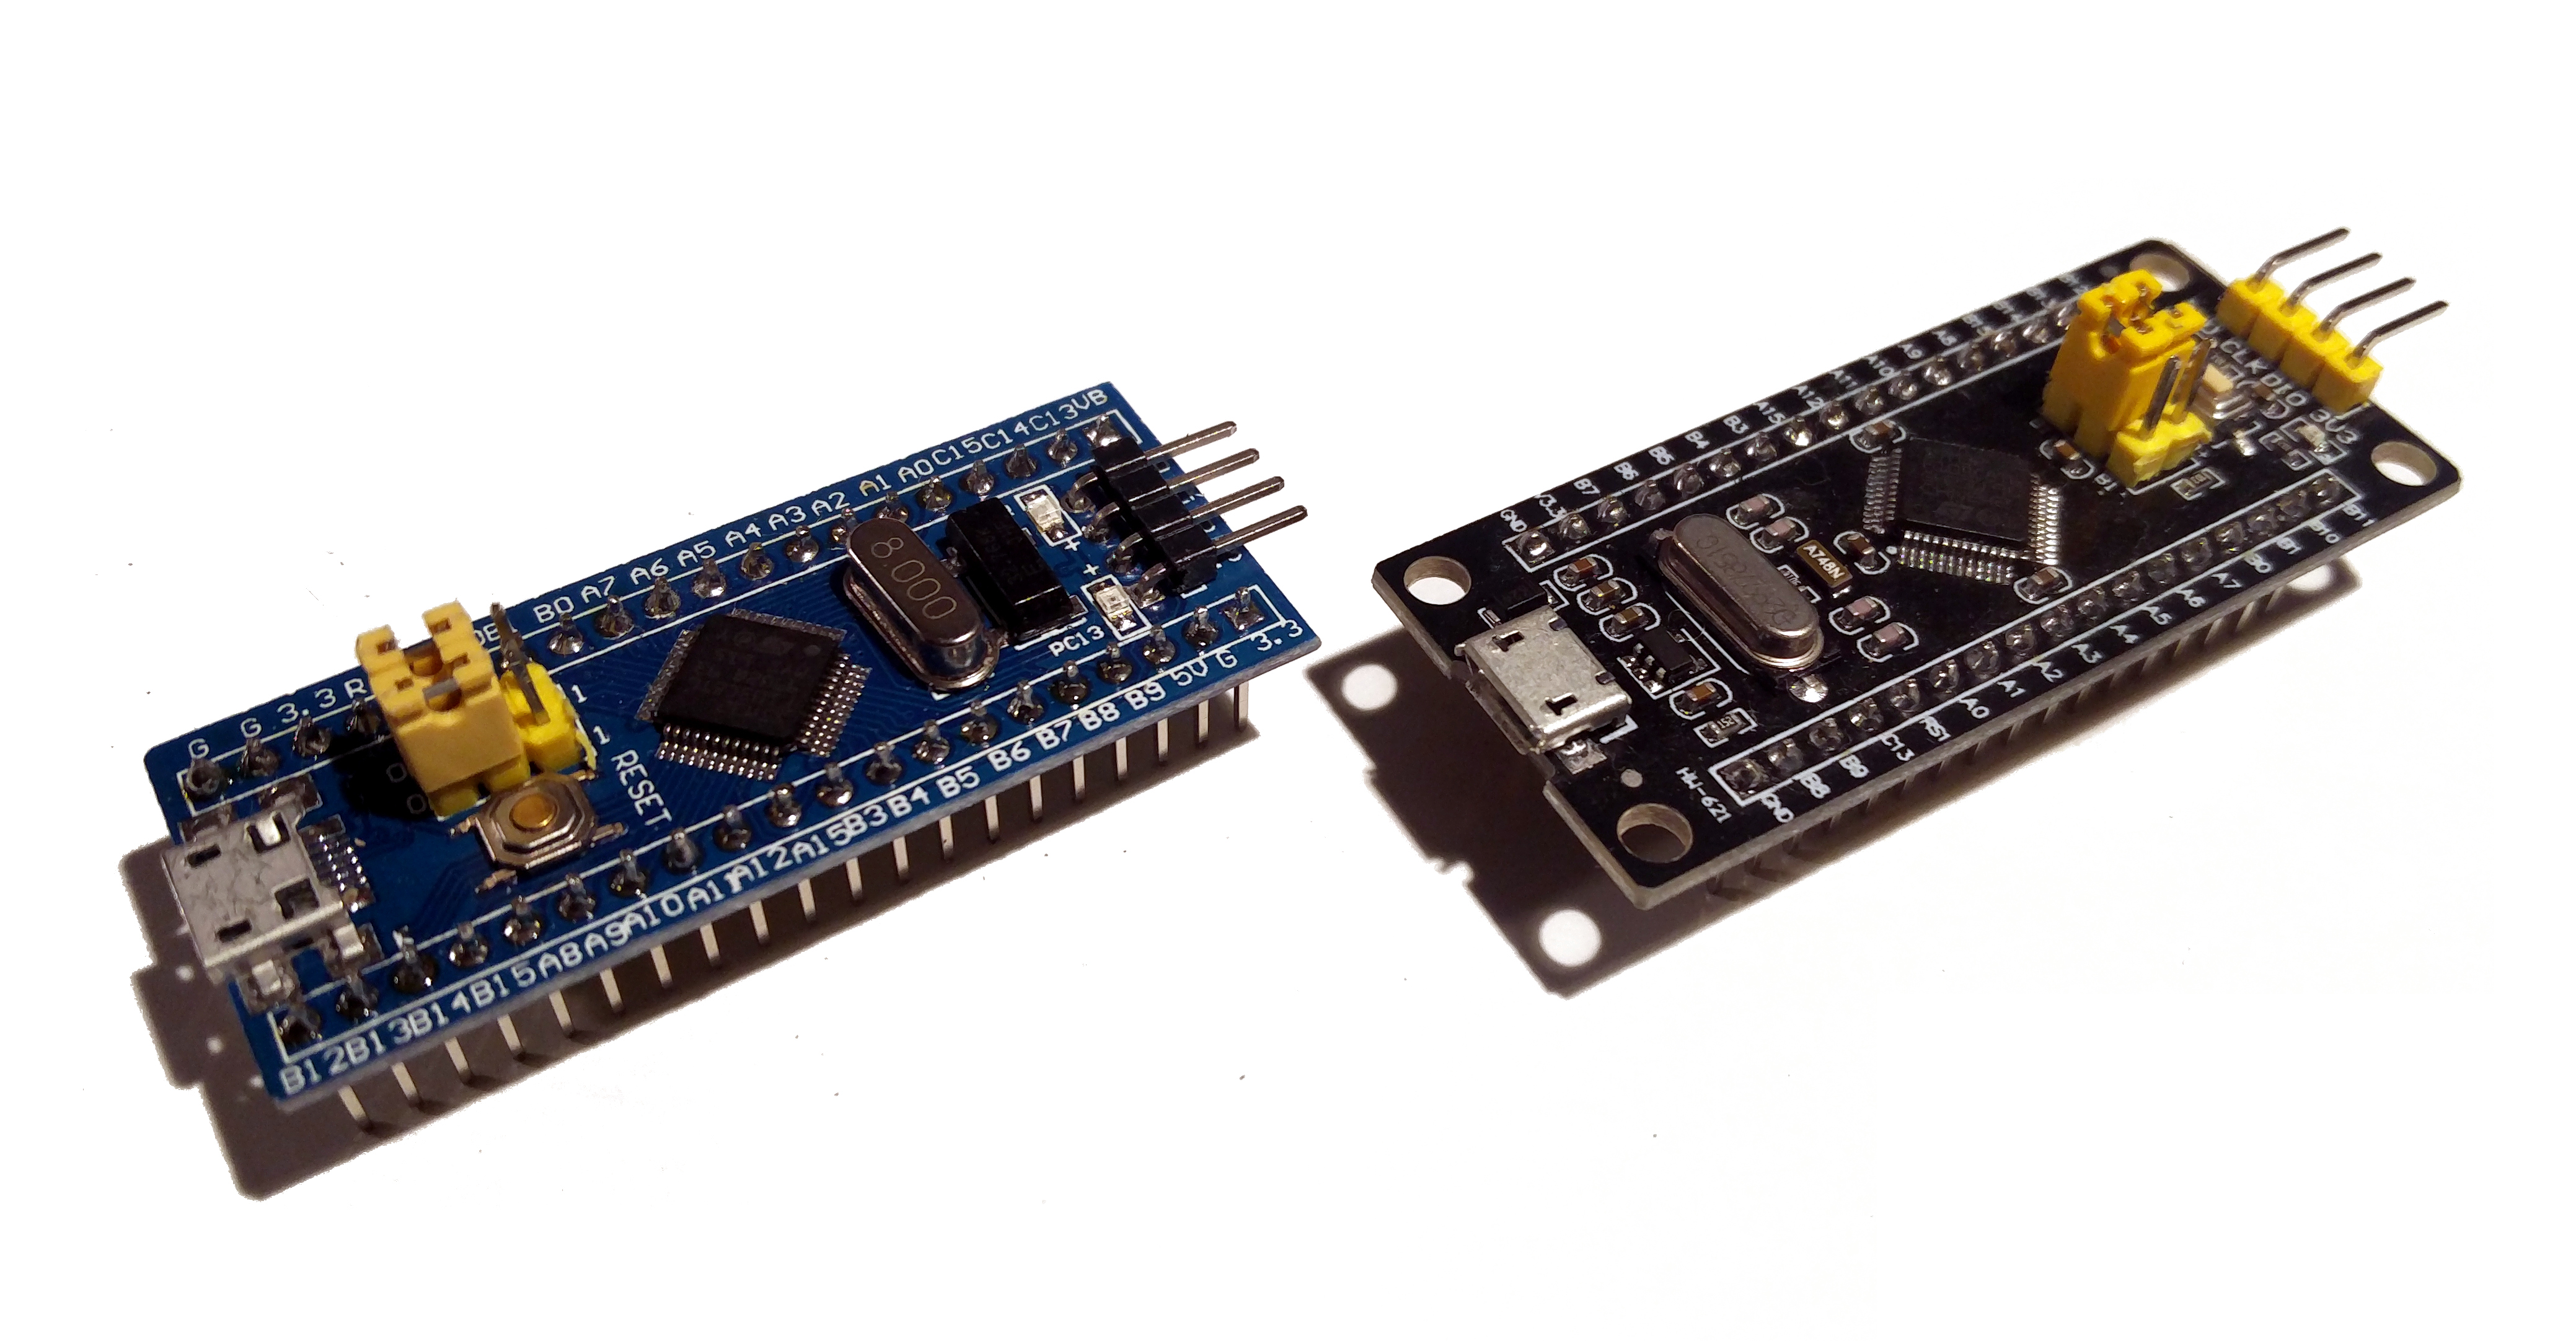
cargo). I only run Linux, but the following is likely to run on MacOS as well, and maybe even on Windows. - A Board with an STM32F103 microcontroller. The most common dev-boards with this controllers are probably the “BluePills” which you usually can get for less than 2€ (e.g. on Aliexpress). We use a BluePill, but other Boards should work very similar. Attention: Especially on Aliexpress there exists an incredible amount of counterfeit chips. If it does not work, this might be the reason.
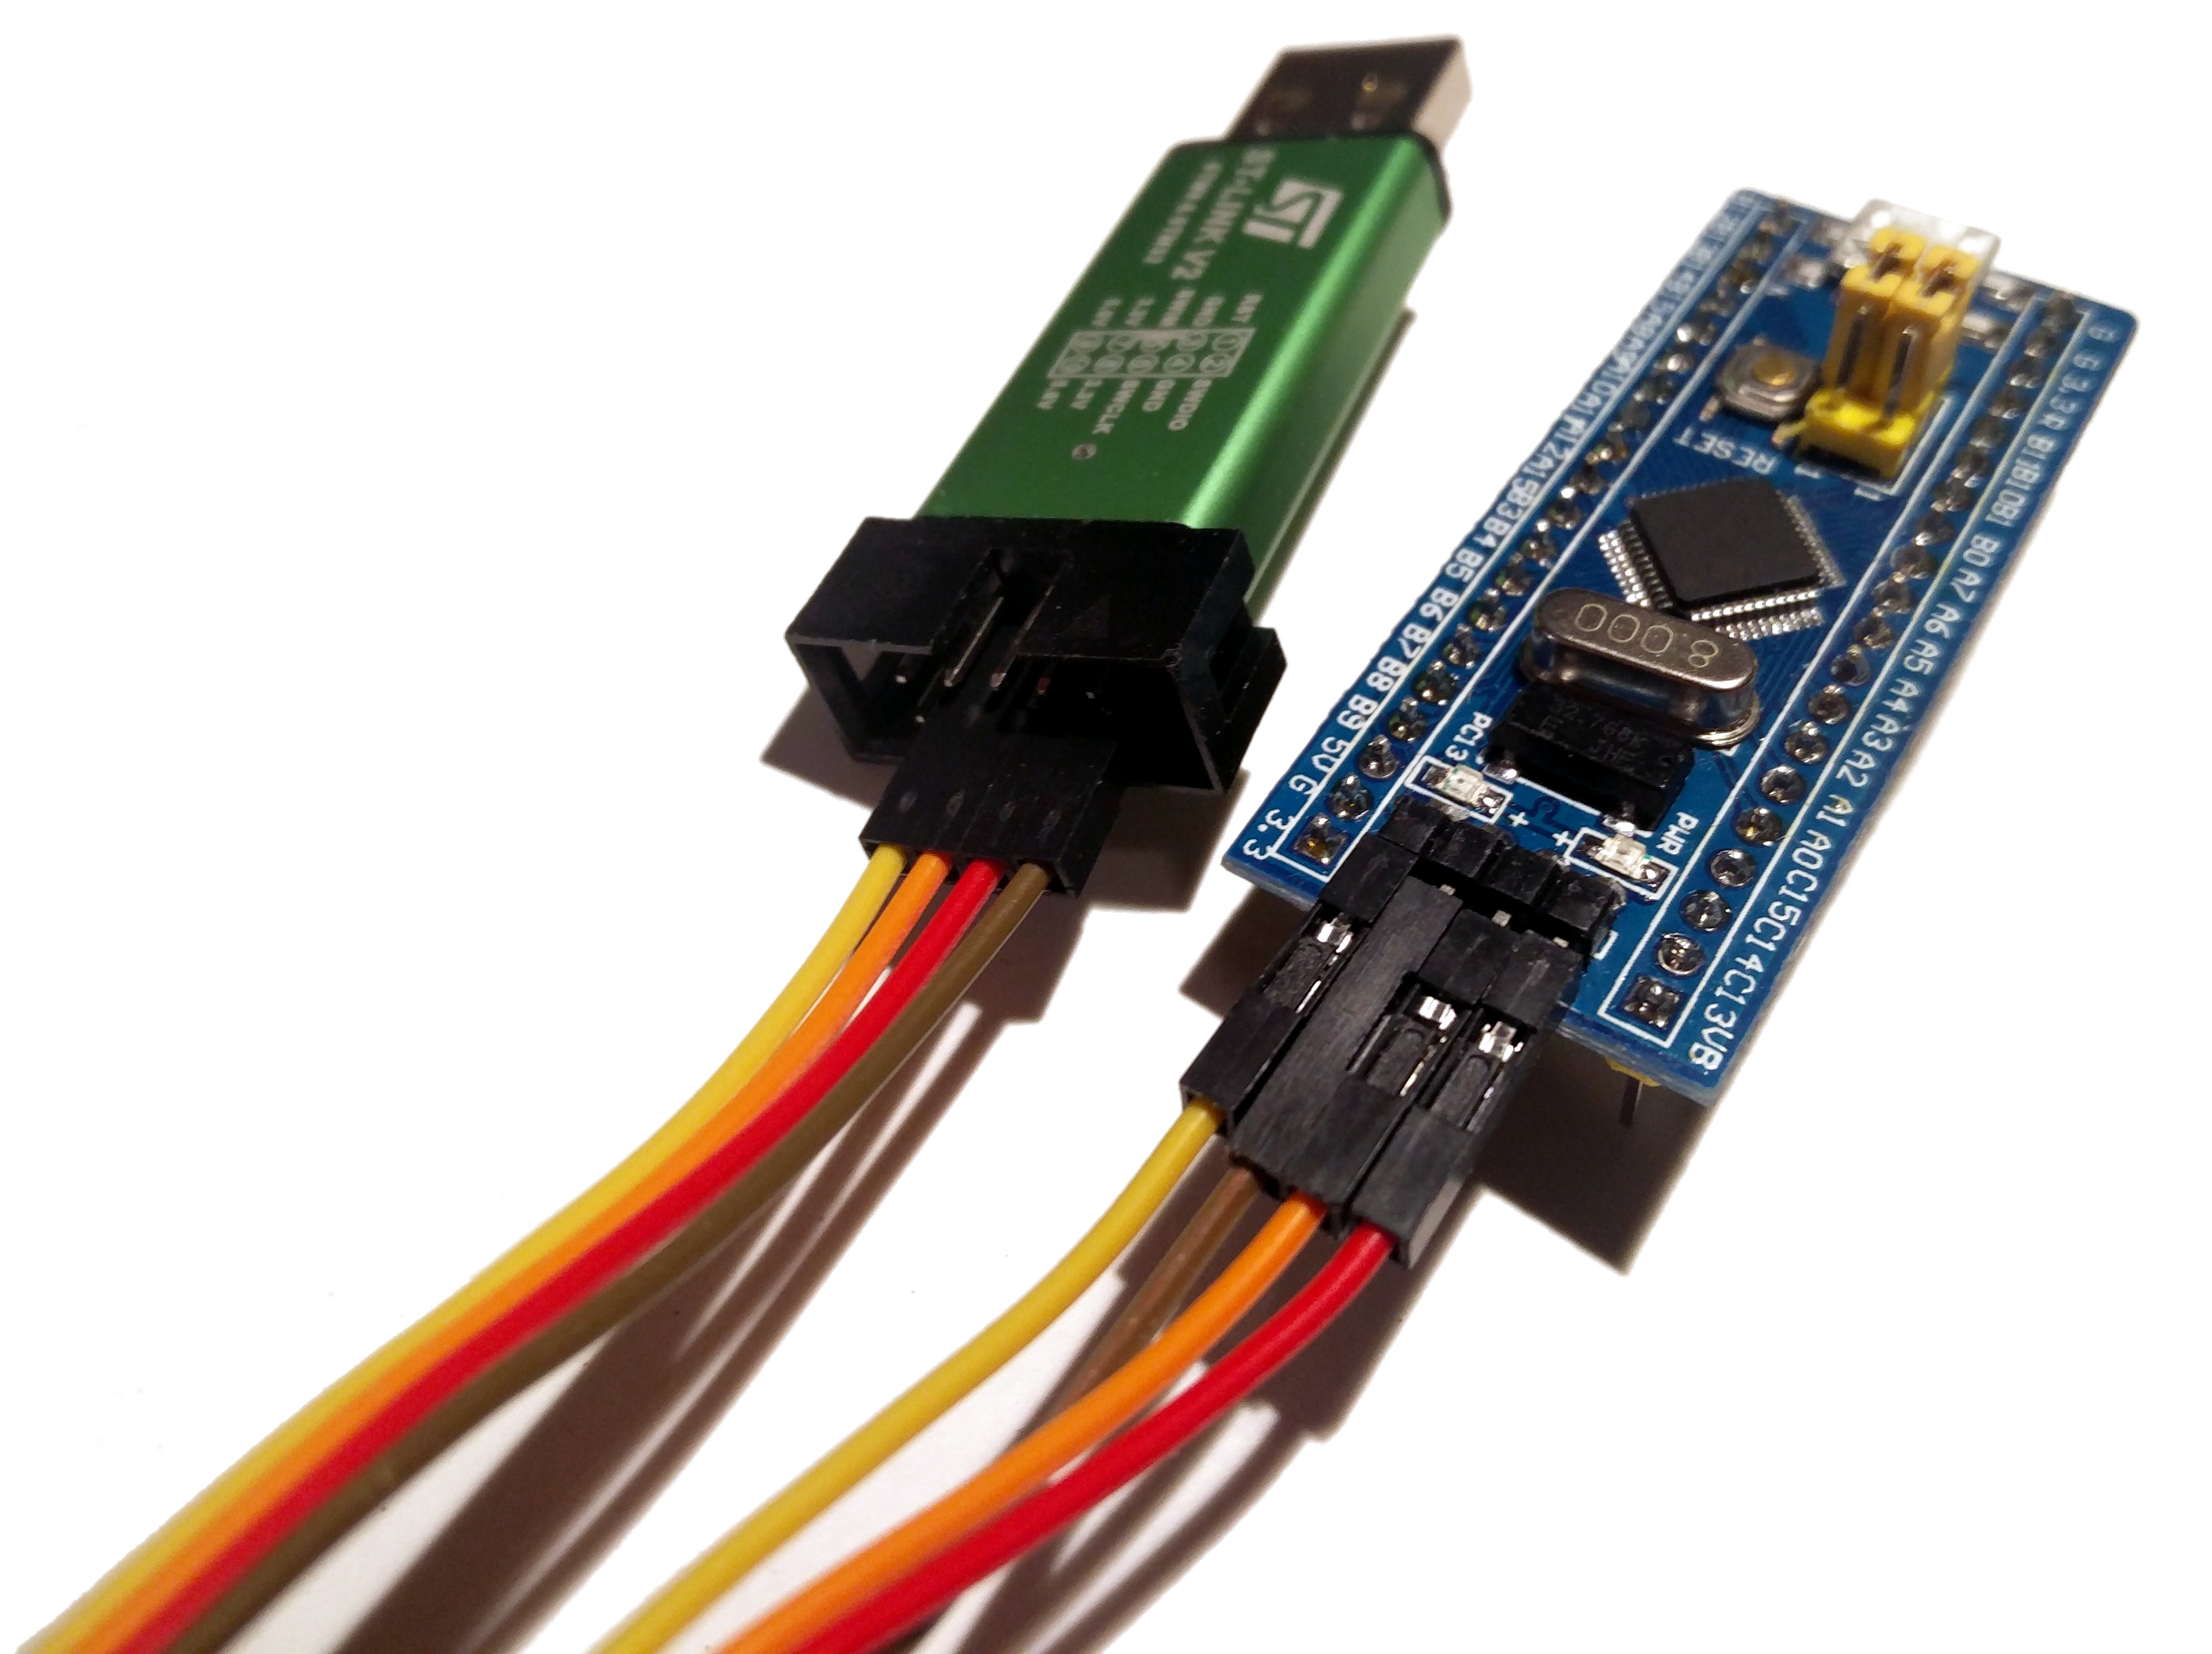
- An Programmer. Among the cheapest programmers you can get for the STM chips is a ST-Link V2 Clone (AliExpress). The Programmer itself is a clone and often contains an “CS32” chip instead of an STM32. Again: Might be a source of trouble.
Software Preparation
At first, let’s make sure we have an up-to-date compiler and cargo:
> rustup update
Then we’ll install the cross-toolchain for the STM32F1, which runs a thumbv7m-none-eabi ARM core:
> rustup target install thumbv7m-none-eabi
For now, we use cargo flash to program the microcontroller.
We can comfortably install this tool via cargo:
> cargo install cargo-flash
And finally we create a new Rust project in a directory of our choice with
> cargo init rusty-blink
Before we write any code, we configure the project, so that it compiles for our thumbv7m-none-eabi target by default and uses the correct linker script (more on that in a second). We do this by creating a file .cargo/config in our project root.
# .cargo/config
[build]
# Always compile for the instruction set of the STM32F1
target = "thumbv7m-none-eabi"

# use the Tlink.x scrip from the cortex-m-rt crate
rustflags = [ "-C", "link-arg=-Tlink.x"]
The next we need is the linker script which tells the linker about the memory layout of the chip. It must lay in the project root and is called memory.x. For the STM32F103C8 this looks as follows:
/* memory.x - Linker script for the STM32F103C8T6 */
MEMORY
{
  /* Flash memory begins at 0x80000000 and has a size of 64kB*/
  FLASH : ORIGIN = 0x08000000, LENGTH = 64K
  /* RAM begins at 0x20000000 and has a size of 20kB*/
  RAM : ORIGIN = 0x20000000, LENGTH = 20K
}
Ok, enough preparation, lets get to Rust/Cargo!
The Blinky Program
Of course, you need a Cargo.toml file to configure your project. There is already one present in your project folder, but we need to add some dependencies and configurations:
(These are current versions as of mid July 2020).
# Cargo.toml
[package]
edition = "2018"
name = "blinky-rust"
version = "0.1.0"

[profile.release]
opt-level = 'z' # turn on maximum optimizations. We only have 64kB
lto = true      # Link-time-optimizations for further size reduction

[dependencies]
cortex-m = "^0.6.3"      # Access to the generic ARM peripherals
cortex-m-rt = "^0.6.12"  # Startup code for the ARM Core
embedded-hal = "^0.2.4"  # Access to generic embedded functions (`set_high`)
panic-halt = "^0.2.0"    # Panic handler

# Access to the stm32f103 HAL.
[dependencies.stm32f1xx-hal]
# Bluepill contains a 64kB flash variant which is called "medium density"
features = ["stm32f103", "rt", "medium"]
version = "^0.6.1"
And finally: Here is a simple blink program! Don’t be afraid, it only looks that long because I added the explanatory comments. Without it’s only ~30 lines 😉.
// src/main.rs

// std and main are not available for bare metal software
#![no_std]
#![no_main]

use cortex_m_rt::entry; // The runtime
use embedded_hal::digital::v2::OutputPin; // the `set_high/low`function
use stm32f1xx_hal::{delay::Delay, pac, prelude::*}; // STM32F1 specific functions
#[allow(unused_imports)]
use panic_halt; // When a panic occurs, stop the microcontroller

// This marks the entrypoint of our application. The cortex_m_rt creates some
// startup code before this, but we don't need to worry about this
#[entry]
fn main() -> ! {
    // Get handles to the hardware objects. These functions can only be called
    // once, so that the borrowchecker can ensure you don't reconfigure
    // something by accident.
    let dp = pac::Peripherals::take().unwrap();
    let cp = cortex_m::Peripherals::take().unwrap();

    // GPIO pins on the STM32F1 must be driven by the APB2 peripheral clock.
    // This must be enabled first. The HAL provides some abstractions for
    // us: First get a handle to the RCC peripheral:
    let mut rcc = dp.RCC.constrain();
    // Now we have access to the RCC's registers. The GPIOC can be enabled in
    // RCC_APB2ENR (Prog. Ref. Manual 8.3.7), therefore we must pass this
    // register to the `split` function.
    let mut gpioc = dp.GPIOC.split(&mut rcc.apb2);
    // This gives us an exclusive handle to the GPIOC peripheral. To get the
    // handle to a single pin, we need to configure the pin first. Pin C13
    // is usually connected to the Bluepills onboard LED.
    let mut led = gpioc.pc13.into_push_pull_output(&mut gpioc.crh);

    // Now we need a delay object. The delay is of course depending on the clock
    // frequency of the microcontroller, so we need to fix the frequency
    // first. The system frequency is set via the FLASH_ACR register, so we
    // need to get a handle to the FLASH peripheral first:
    let mut flash = dp.FLASH.constrain();
    // Now we can set the controllers frequency to 8 MHz:
    let clocks = rcc.cfgr.sysclk(8.mhz()).freeze(&mut flash.acr);
    // The `clocks` handle ensures that the clocks are now configured and gives
    // the `Delay::new` function access to the configured frequency. With
    // this information it can later calculate how many cycles it has to
    // wait. The function also consumes the System Timer peripheral, so that no
    // other function can access it. Otherwise the timer could be reset during a
    // delay.
    let mut delay = Delay::new(cp.SYST, clocks);

    // Now, enjoy the lightshow!
    loop {
        led.set_high().ok();
        delay.delay_ms(1_000_u16);
        led.set_low().ok();
        delay.delay_ms(1_000_u16);
    }
}
Let’s build it!
> cargo build --release
   Compiling semver-parser v0.7.0
   Compiling typenum v1.12.0
   [...]
   Compiling cortex-m-rt-macros v0.1.8
   Compiling stm32f1xx-hal v0.6.1
   Compiling blinky-rust v0.1.0 (/home/xxx/xxx/Rust/embedded/rusty-blink)
    Finished release [optimized] target(s) in 34.63s
For the blink example you can leave out the --release, but when you compile a more complicated program you will run out of device memory fast without optimization enabled.
My resulting program takes 864 bytes of memory (2,8kB without LTO). To check this, you have to convert the compiler output (an elf file) to hex/binary.
You can for example use arm-none-eabi-objcopy -O binary target/thumbv7m-none-eabi/release/blinky-rust blinky-rust.bin and then ls.
Now you are ready to flash the controller with cargo flash.
It should auto-detect your ST-Link and use it to program the microcontroller.
You only have to specify the target chip (stm32f103C8).
> cargo flash --chip stm32f103C8 --release
    Finished release [optimized] target(s) in 0.02s
    Flashing /home/xxx/xxx/Rust/embedded/rusty-blink/target/thumbv7m-none-eabi/release/blinky-rust
        WARN probe_rs::architecture::arm::core::m4 > Reason for halt has changed, old reason was Halted(Request), new reason is Exception
        WARN probe_rs::architecture::arm::core::m4 > Reason for halt has changed, old reason was Halted(Breakpoint), new reason is Request
        WARN probe_rs::architecture::arm::core::m4 > Reason for halt has changed, old reason was Halted(Request), new reason is Exception
     Erasing sectors ✔ [00:00:00] [#############################]   1.00KB/  1.00KB @   1.49KB/s (eta 0s )
 Programming pages   ✔ [00:00:01] [#############################]   1.00KB/  1.00KB @     583B/s (eta 0s )
(The warnings can be ignored, cargo flash is still a young project and has some faults.)
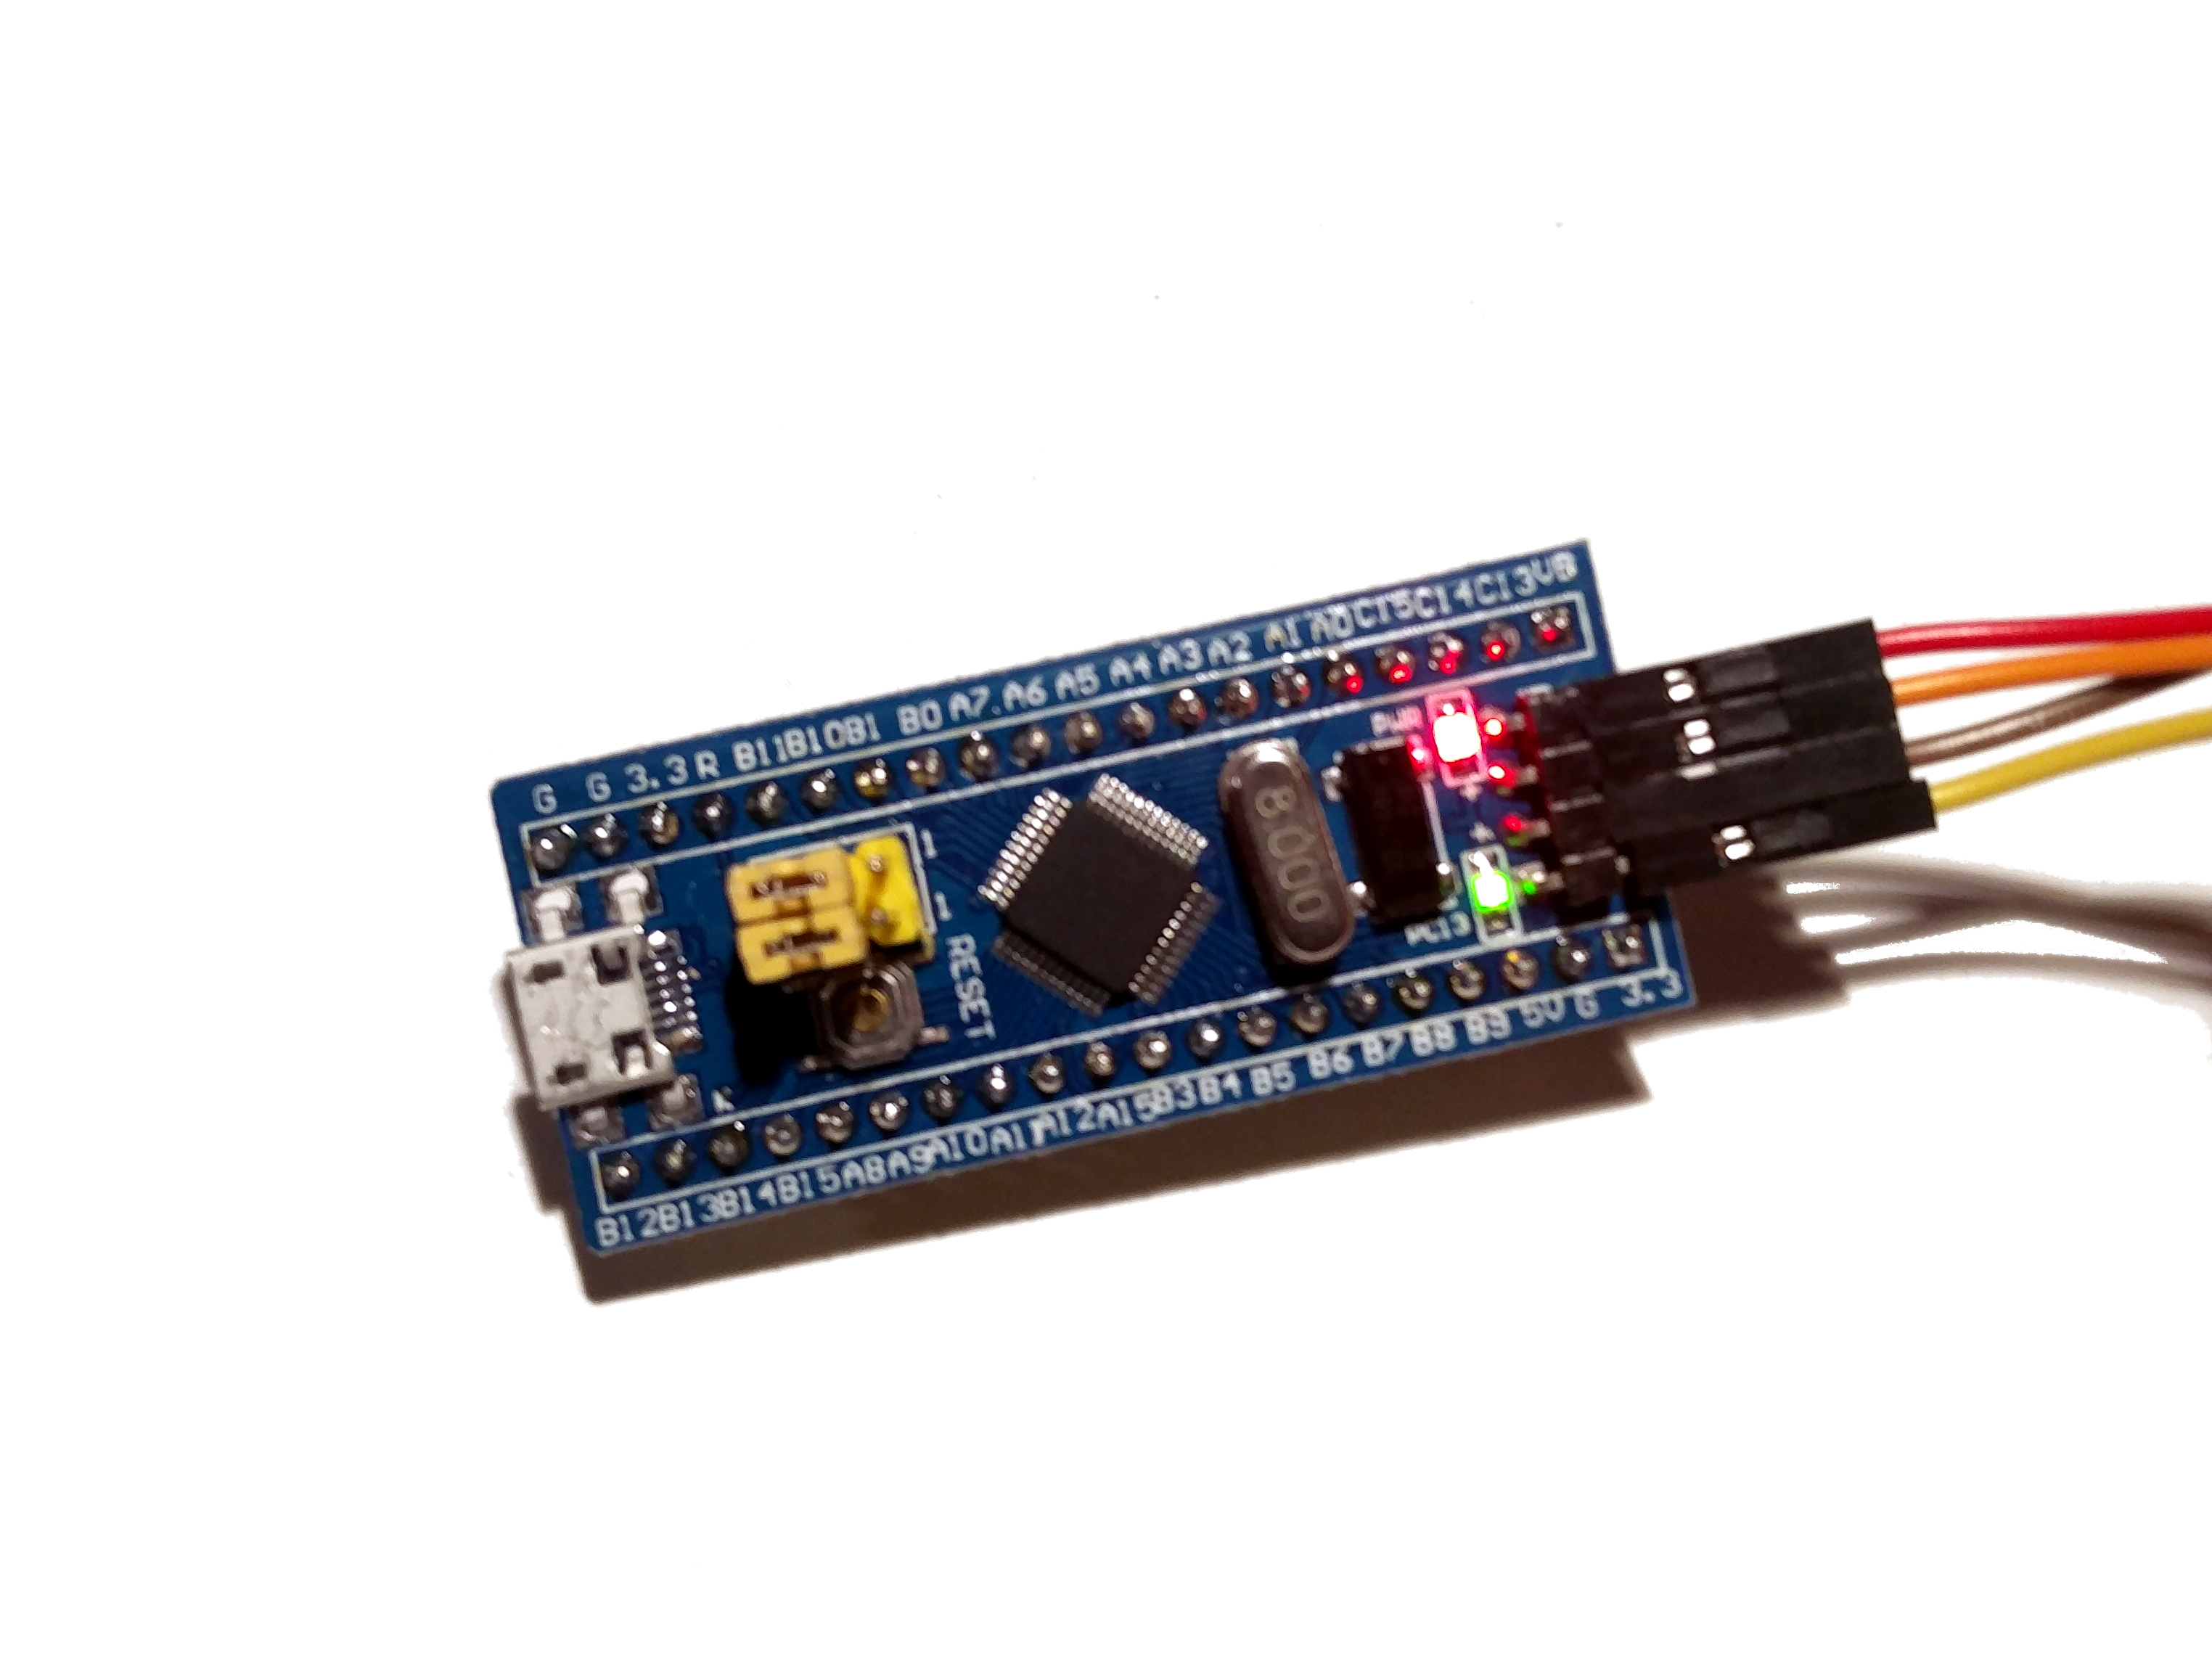
You should now see the blinking onboard LED!
I’m hyped! What’s next?
Good you asked! I prepared some link’s for you:
- The
stm32f1xx_hals documentation - Plenty of examples for the
stm32f1xx_hal - You can find this example’s code on Gitlab
I also plan to do some more posts on this, but you know… time and motivation. If you have any questions or want to remind me to write some more posts, feel free to contact me! 🙂👍